
前言
2022年8月25日,我做了个新项目RPageSearch来实现静态站的全站搜索功能,并且也发了篇新博客《静态站实现全站搜索》。当时在文章的结尾我是这么说的:
“说回主角,我把它在Github立了个项,放在Github@RavelloH/RPageSearch中,现在没有时间不会再去更新它,但是以后正好最近重制主题,为了契合新主题的风格以及性能优化正好也把RPageSearch升级了一下。现在它具有比以前丰富得多的功能,性能方面也极大的提升了。遂做篇新文章来作为新的使用文档。(也可能是很久以后)会陆续升级一下,加入模糊搜索等功能。”
项目v2版本现已发布,Releases见下: Releases · RavelloH/RPageSearch
更新内容
- 性能优化,MB级数据索引速度小于100ms
- 可搜索内容扩大,从之前的标题+内容升级为标题+内容+章节+标签+分类+外链等等
- 更快的即时搜索
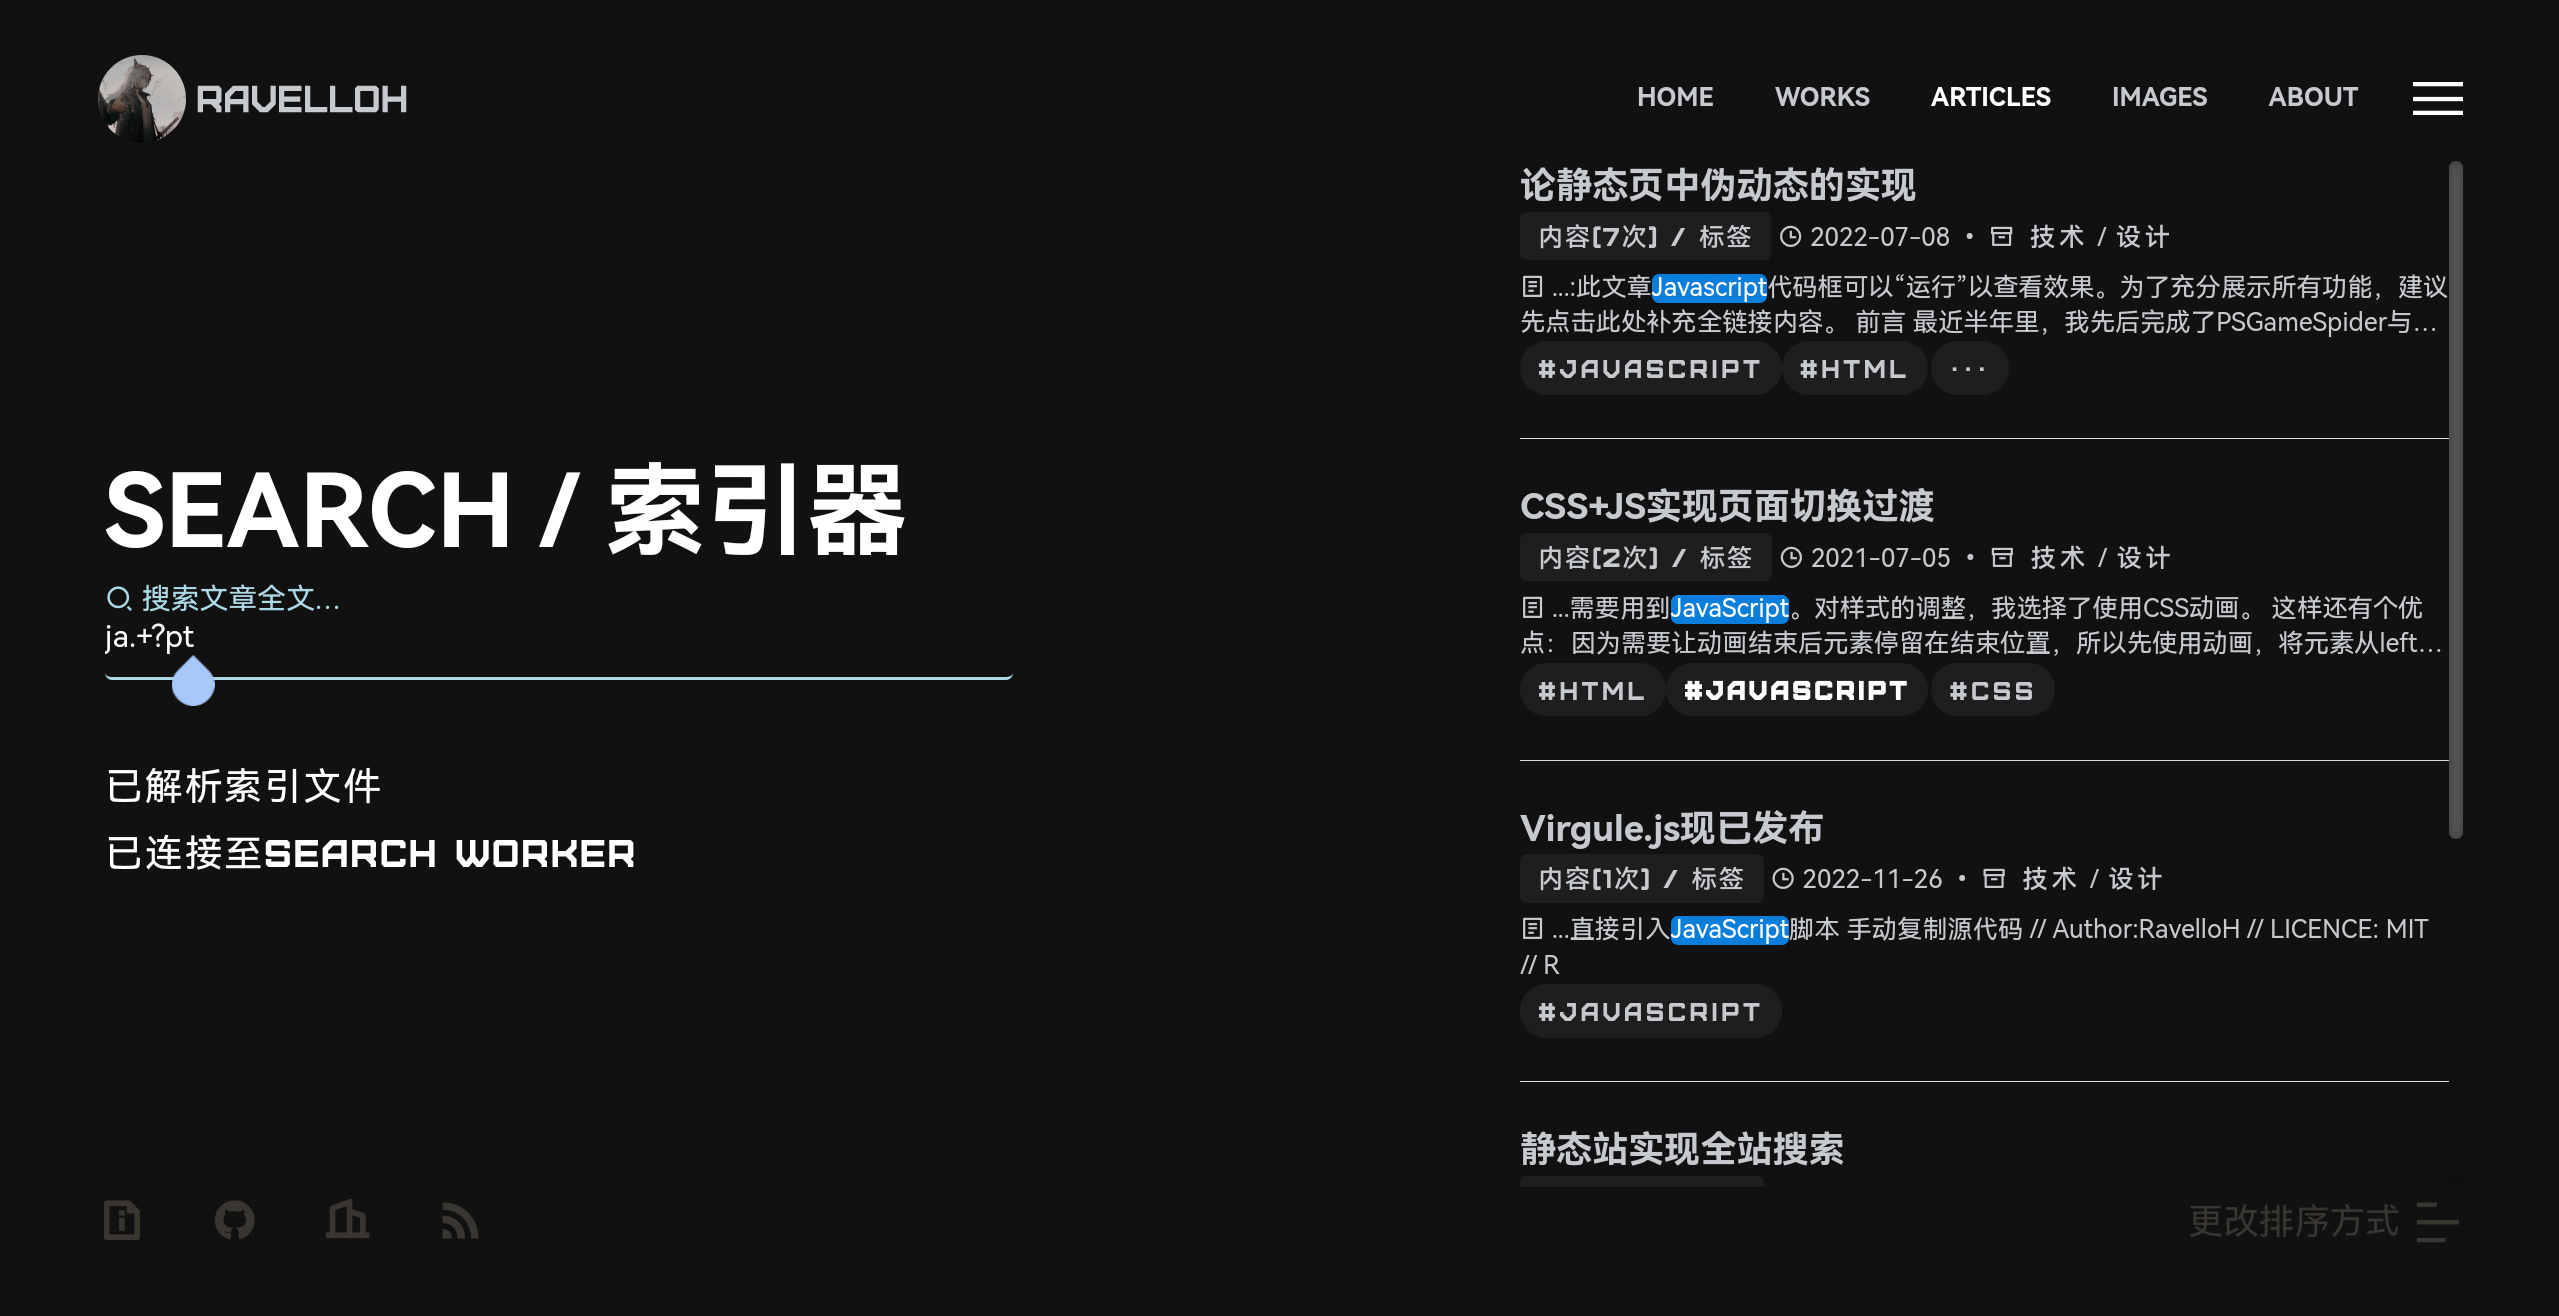
- 搜索语法拓展,可使用正则表达式实现模糊搜索
- 使用Web Worker异步运算,不会堵塞主进程
- 自动持续构建升级,转入NodeJs框架
- 可拓展的标准数据格式,索引文件及结果均使用Object格式存储
- 可自定义的前端模板样式
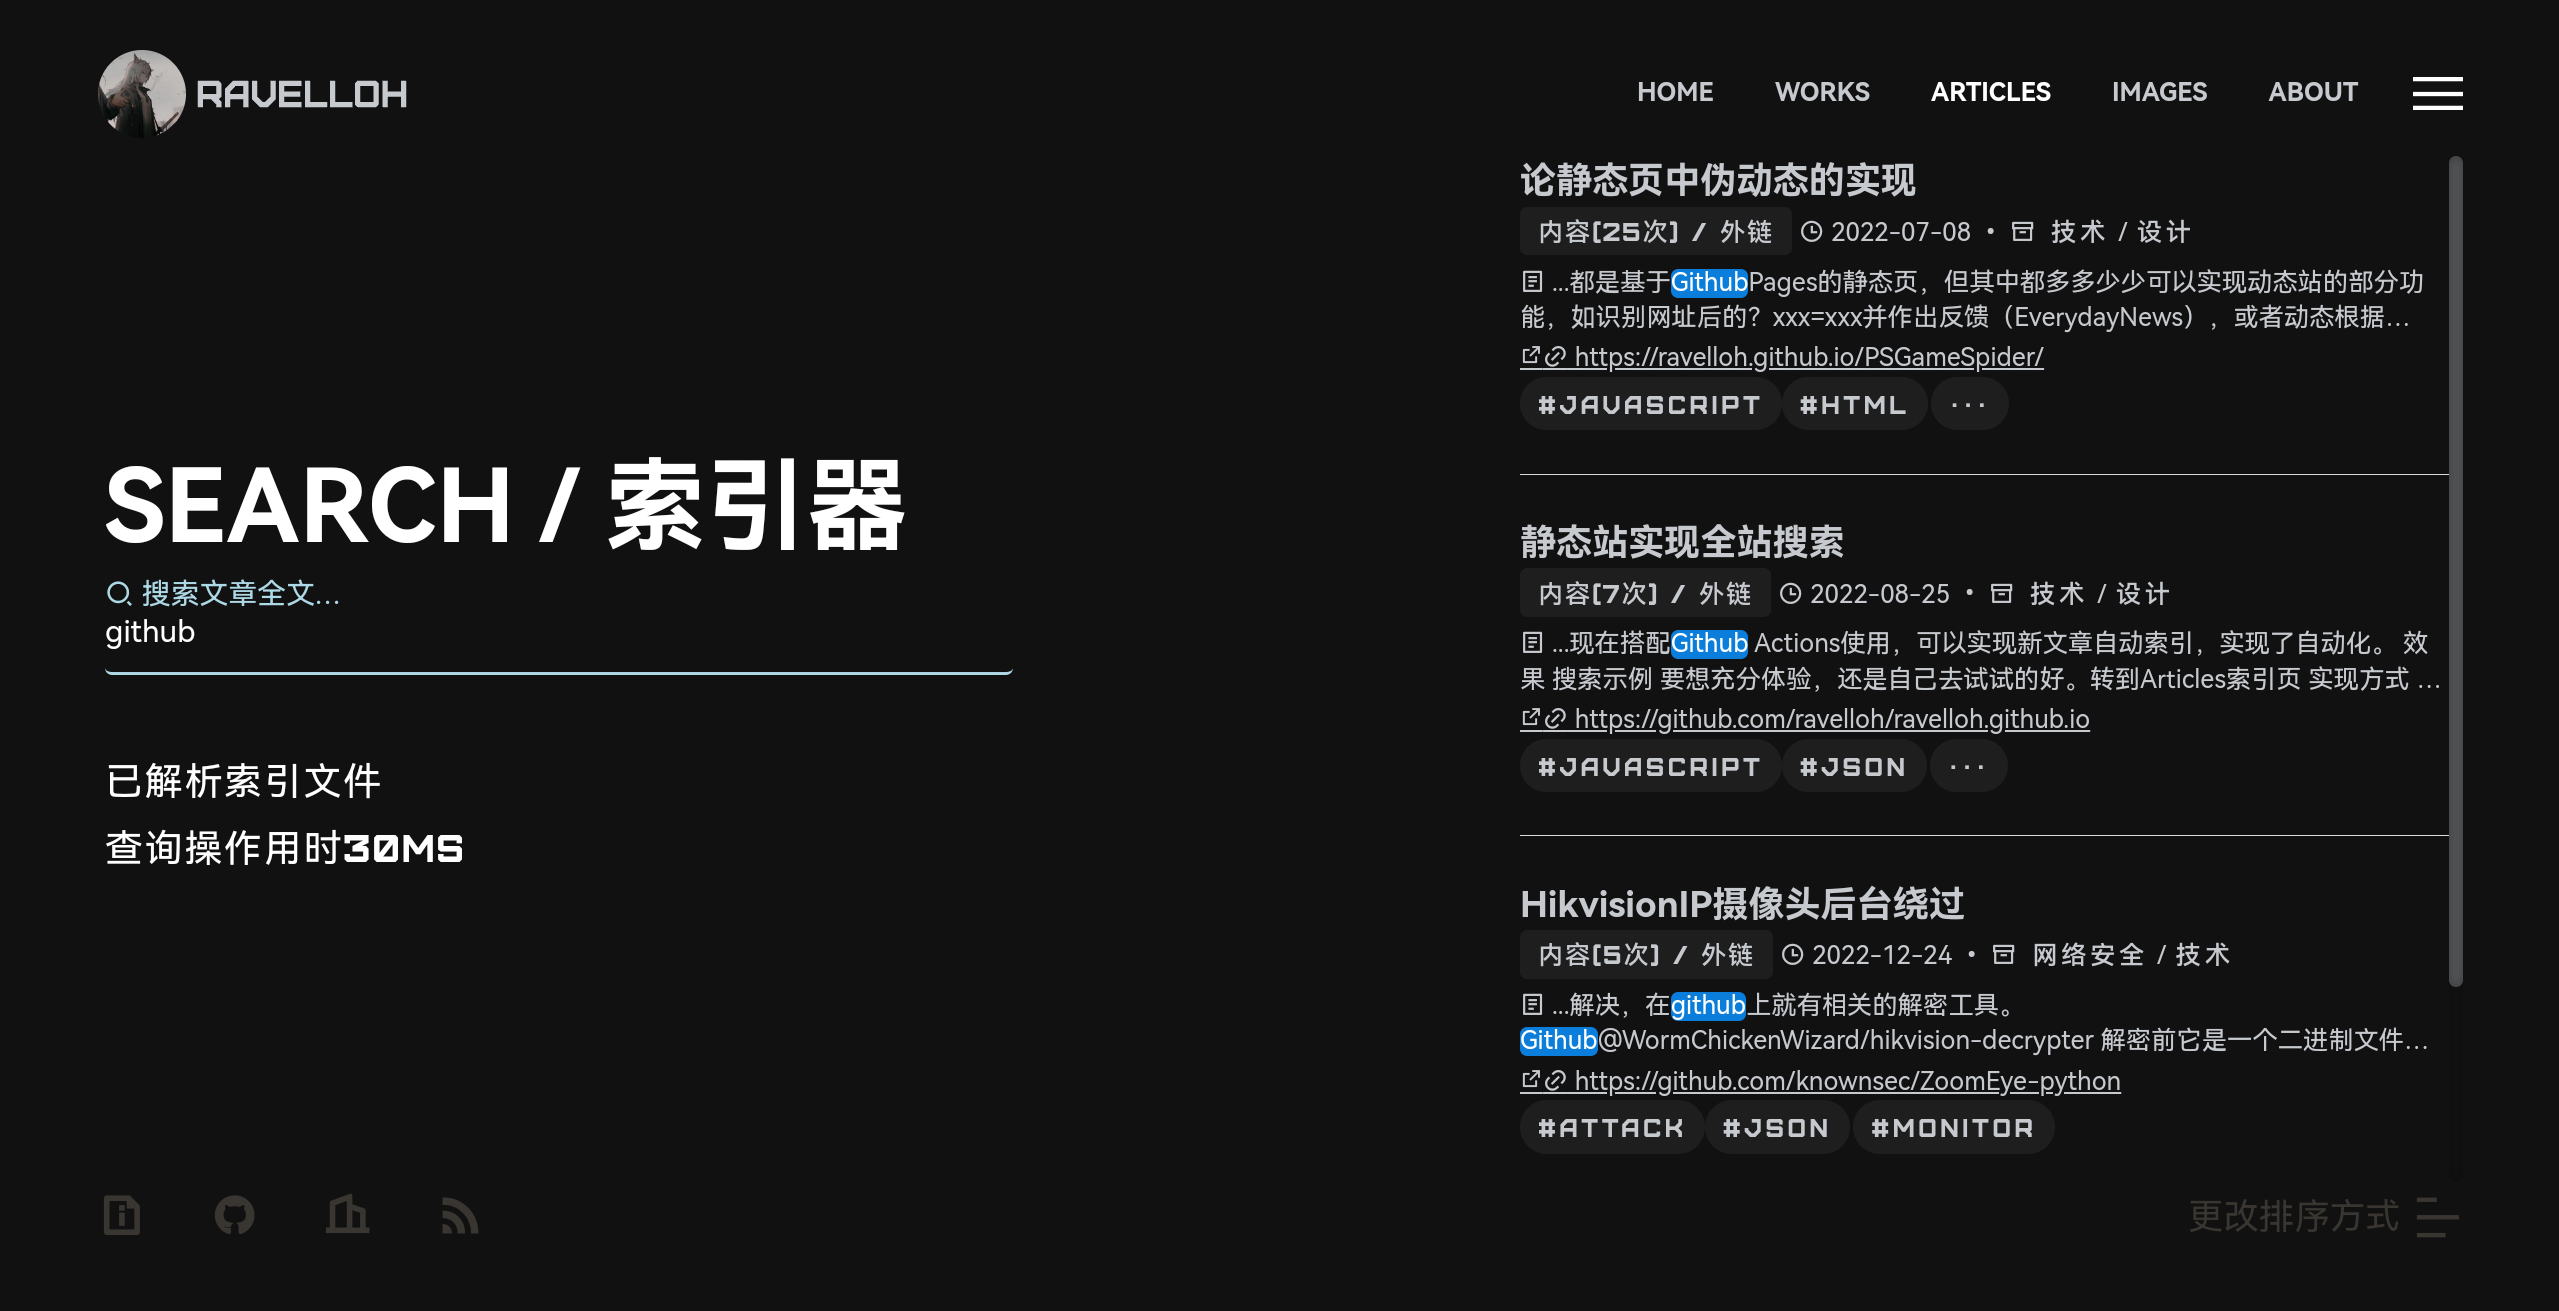
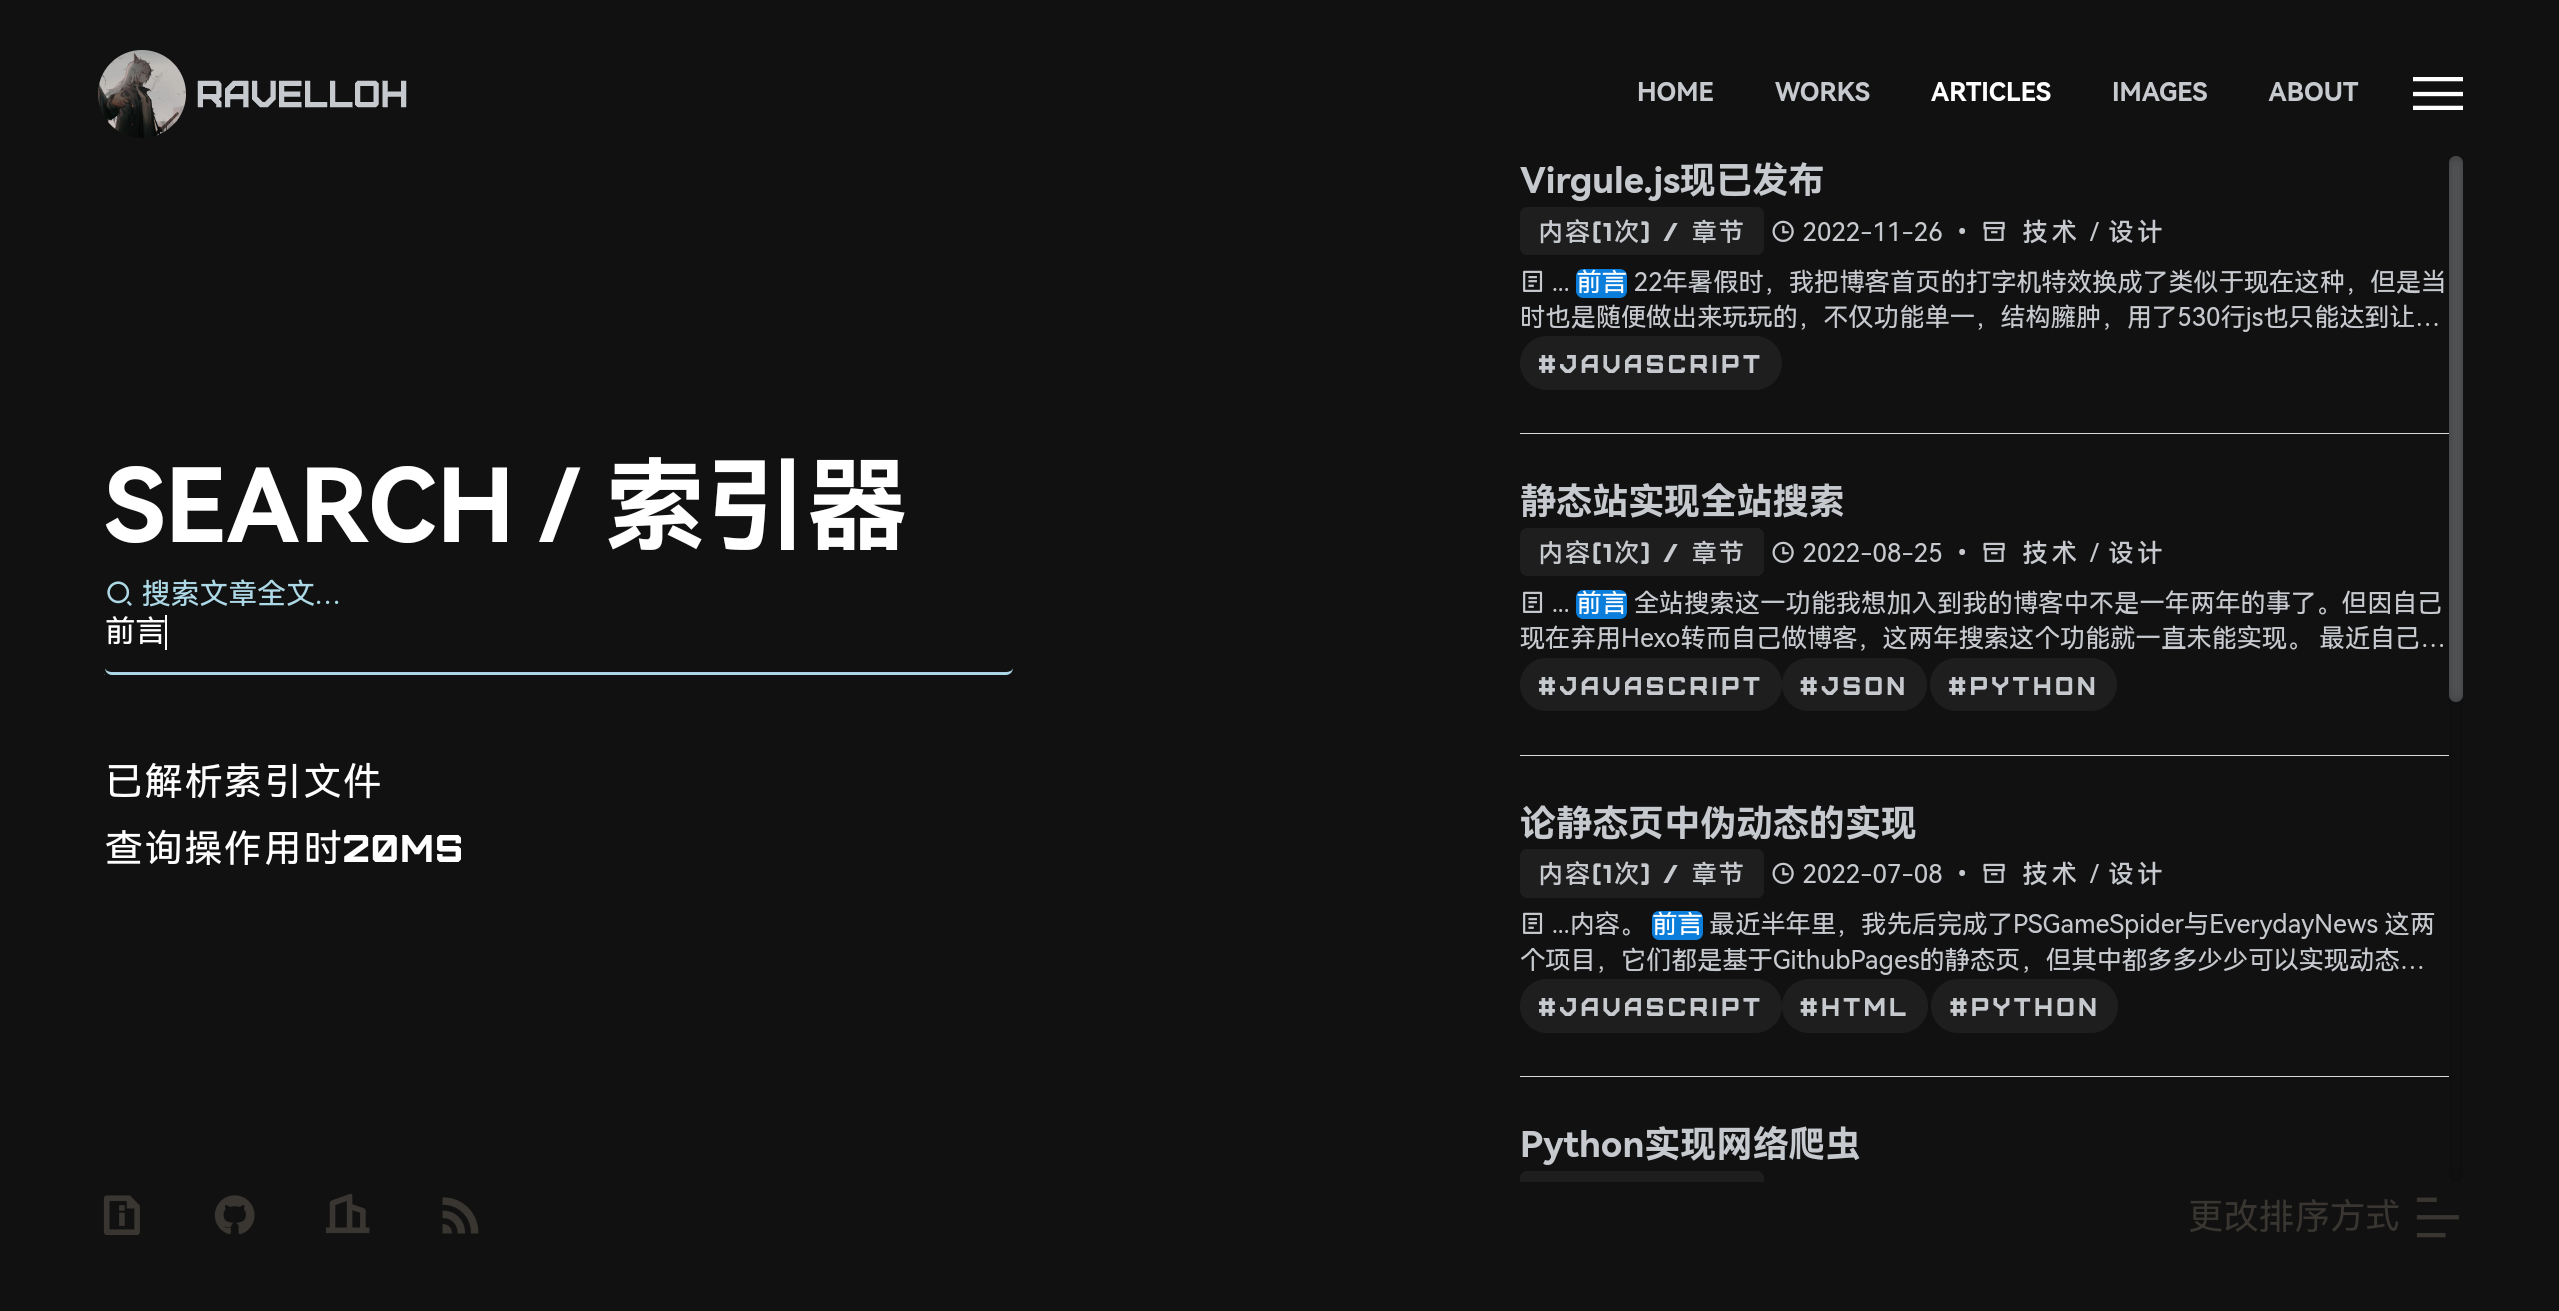
效果
在我的博客中可直接试用此搜索功能,感受它的高性能。
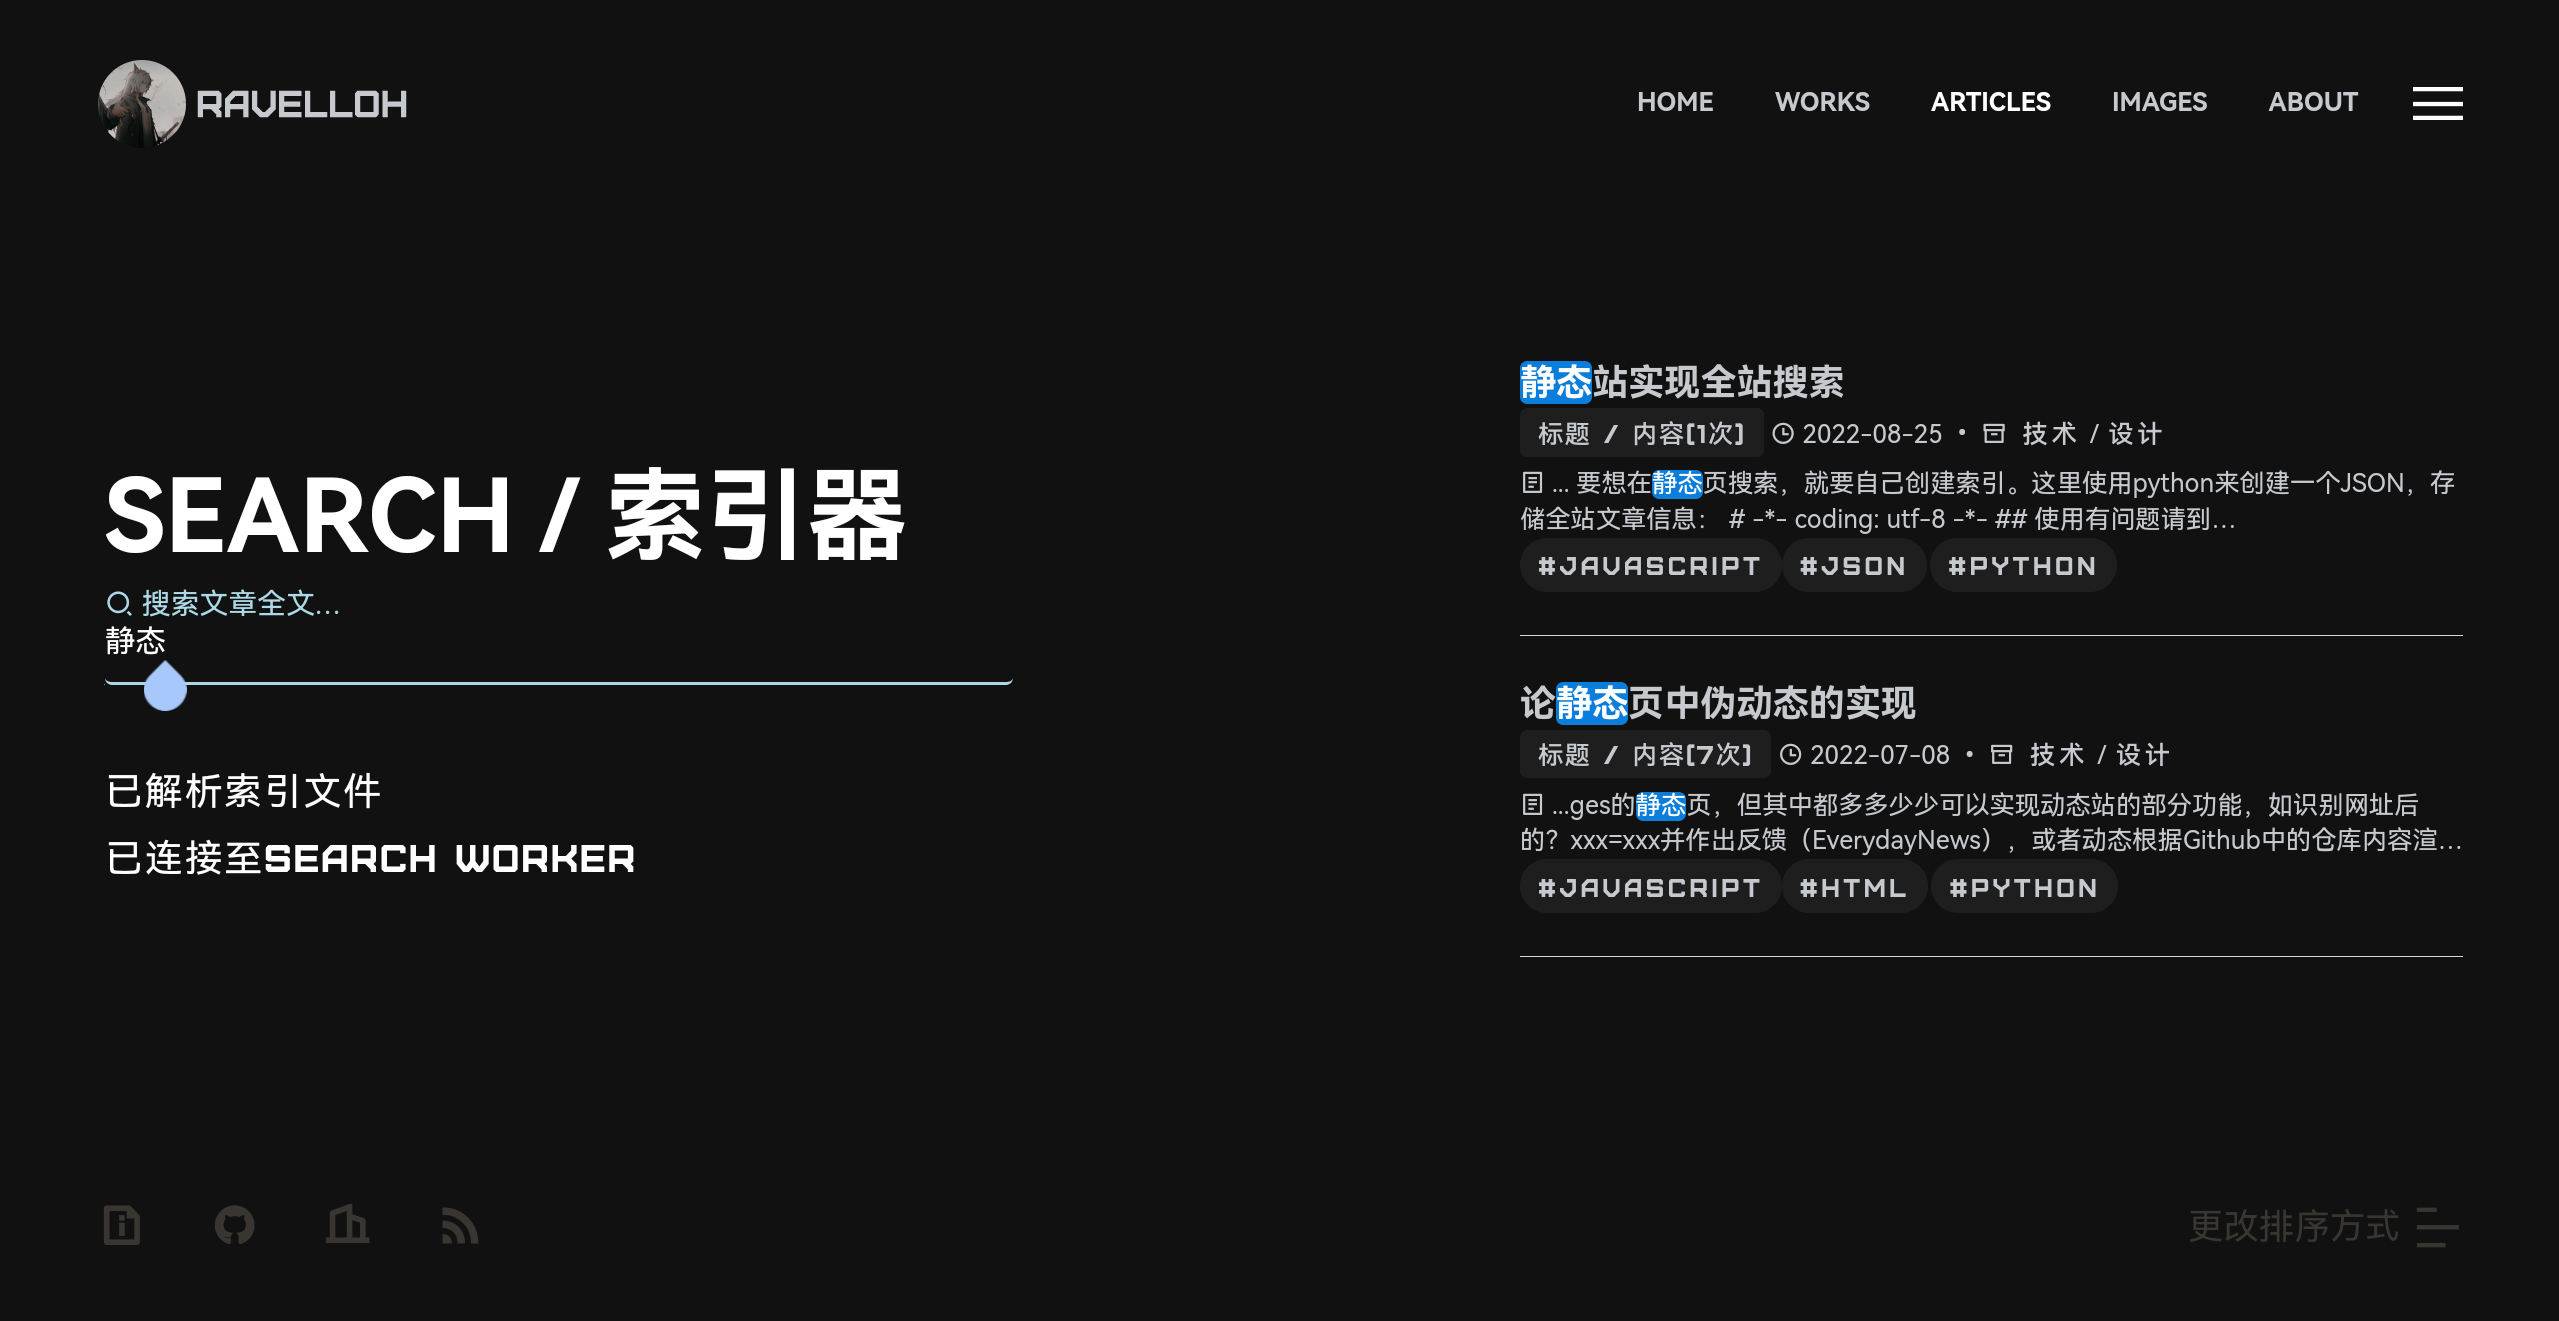
原理
构建时运行search.js,这会对站点所有文章进行索引并生成一个索引文件search.json。
在客户端使用时,浏览器会请求生成的search.json,并与Web Workersearch.worker.js建立连接。
在搜索时,搜索词及索引数据将会被发送至Worker并处理,Worker返回一个JSON格式的搜索结果。
之后,前端处理返回的结果并展示。
使用
此项目及下方所用到的所有文件/代码片段均位于RPageSearch仓库内。 Github:RavelloH/RPageSearch
初始化配置
注意:你需要先根据自己的页面结构调整脚本
配置目录结构
例子: 如果你的文章目录结构如下:
                ......
                ├── articles
                │   ├── 20200816
                │   │   ├── index.html
                │   ├── 20210701
                │   │   └── index.html
                │   ├── 20210705
                │   │   └── index.html
                │   ├── 20210719
                │   │   └── index.html
                │   ├── 20220206
                │   │   └── index.html
                ......
需要在search.js中这样配置:
                // 配置区
                const articlesFolder = "../articles/"; // 文章根目录
                const articlesFileName = "index.html"; // 文档文件名
                const savePath = "../assets/data/search.json";
这将会匹配这样的内容:../articles/*/index.html
RPageSearch默认会在articlesFolder中列出所有目录,并检测其中是否含有articlesFileName,如果有则进行解析。
其中,savePath定义了生成数据的保存路径,后期会用到。
配置页面结构
例子: 如果你的文章文档结构如下:
                <article>
                    <div id="articles-header">
                        <h2><a href="/articles/20221224/">HikvisionIP摄像头后台绕过</a></h2><p class="articles-info">
                            <time>2022-12-24</time> •<span class="i_small ri:archive-line"></span><span class="class"><a>网络安全</a>/<a>技术</a></span> •<span class="i_small ri:t-box-line"></span> <span id="textLength">----字</span> •<span class="i_small ri:search-eye-line"></span> <span id="pageVisitors">---</span>
                        </p>
                        <p class="articles-tags">
                            <span class="i_small ri:price-tag-3-line"></span><a>ATTACK</a><a>JSON</a><a>MONITOR</a>
                        </p>
                        <hr>
                    </div>
                    <div id="articles-body">
                        <h3>标题</h3><p>
                            正文内容
                        </p>
                        <br><br><h3>标题</h3><p>
                            正文
                        </p>
                        <h3>标题</h3><p>
                            正文
                        </p>
                    </div>
                    <div id="articles-footer">
                        略
                    </div>
                </article>
可以在search.js中这样配置:
                // 选择器
                const articlesName = "#articles-header h2 a"; // 文章标题元素
                const articlesUrl = "#articles-header h2 a"; // 文章链接元素
                const articlesTime = "#articles-header .articles-info time"; // 文章时间元素
                const articlesClass = "#articles-header .articles-info .class a"; // 文章分类元素
                const articlesTag = "#articles-header .articles-tags a"; // 文章标签元素
                const articlesBody = "#articles-body"; // 文章正文元素
                const articlesImages = "#articles-body img"; // 文章图片元素
                const articlesLinks = "#articles-body a"; // 文章外链元素
                const articlesTitle =
                "#articles-body h2 , #articles-body h3 , articles-body h4 , articles-body h5 , articles-body h6"; // 文章小标题元素
这里可以任意使用CSS选择器,参考如上。
生成索引数据
安装依赖并执行search.js
npm install
                node search.js
不出意外,用于保存结果的search.json会正常生成在之前定义的路径savePath中。
此文件用于与search.worker.js通信,其格式一般不需要调整,为所有索引的对象,其中的一项格式如下:
                {
                    "name": "Minecraft反转药水效果",
                    "url": "/articles/20200816/",
                    "time": "2020-08-16",
                    "class": [
                        "游戏"
                    ],
                    "tag": [
                        "minecraft",
                        "json"
                    ],
                    "title": [
                        "原理",
                        "效果",
                        "命令"
                    ],
                    "context": "文章内容,略"
                    "img": [
                        "/articles/20200816/show1.gif",
                        "/articles/20200816/show2.gif",
                        "/articles/20200816/show3.gif"
                    ],
                    "links": []
                }
前端接入
你需要在frontEnd.js中自定义以适应你的样式。详细的例子,可以参照我的博客或RTheme search.worker.js一般不需要调整。它会在搜索时返回以下结构的结果:
                [{
                    "name": "论静态页中伪动态的实现",
                    "url": "/articles/20220708/",
                    "time": "2022-07-08",
                    "class": [
                        "技术",
                        "设计"
                    ],
                    "tag": [
                        "javascript",
                        "html",
                        "python"
                    ],
                    "title": [
                        "前言",
                        "效果",
                        "实现方法",
                        "页面自动构建"
                    ],
                    "context": "文章内容,这里略"
                    "img": [
                        "/articles/20220708/show1.gif",
                        "/articles/20220708/show2.png",
                        "/articles/20220708/code3.png"
                    ],
                    "links": [
                        "?text=123&?name=aaa#锚点",
                        "https://ravelloh.github.io/PSGameSpider/",
                        "https://ravelloh.github.io/EverydayNews/",
                        "https://github.com/RavelloH/PSGameSpider",
                        "?text=123&?name=aaa#实现方法",
                        "https://docs.github.com/cn/actions",
                        "https://github.com/RavelloH/PSGameSpider",
                        "https://github.com/RavelloH/EverydayNews"
                    ],
                    "match": [
                        [
                            "context",
                            25,
                            118
                        ],
                        [
                            "links",
                            1
                        ]
                    ],
                    "matchTimes": 25
                },
                {
                        "name": "静态站实现全站搜索",
                        "url": "/articles/20220825/",
                        "time": "2022-08-25",
                        "class": [
                            "技术",
                            "设计"
                        ],
                        "tag": [
                            "javascript",
                            "json",
                            "python"
                        ],
                        "title": [
                            "前言",
                            "效果",
                            "实现方式",
                            "代码分析",
                            "后言"
                        ],
                        "context": "文章内容,这里略"
                        "img": [
                            "/articles/20220825/show1.jpg"
                        ],
                        "links": [
                            "/articles/",
                            "https://github.com/ravelloh/ravelloh.github.io",
                            "https://github.com/ravelloh/RPageSearch"
                        ],
                        "match": [
                            [
                                "context",
                                7,
                                103
                            ],
                            [
                                "links",
                                1
                            ]
                        ],
                        "matchTimes": 7
                }]
返回的对象包含索引的所有内容,并已经按照相关度排序,且其匹配项会被包裹在<mark></mark>标签内。除此以外,还会包含一个特殊值match用于表示所有匹配的结果数据。
match定义了一个结果列表,其每一项的第一项表示匹配的属性,第二项表示匹配的属性在所有属性中的排序。
其中,context属性与其他属性稍微不同,它的第二项是匹配个数,第三项是第一次匹配的字符位置。
match的最后一项是matchTimes,表示匹配次数。如果含有标题匹配,这个值会是999999以确保其在结果中置顶。
因为是使用worker通讯,你可以参照frontEnd.js中的search函数配置你的结果展示。
在示例中,搜索的核心实现如下:
function getSearchData() {
                    if (typeof searchData == "undefined") {
                        return new Promise((resolve, reject) => {
                            fetch(dataFilePath, {})
                            .then((response) => response.json())
                            .then((data) => {
                                searchData = data;
                                resolve(data);
                            });
                        }).catch((err) => {
                            throw err;
                        });
                    } else {
                        return Promise.resolve(searchData);
                    }
                }
                function search(keyword) {
                    let start = new Date().getTime();
                    if (keyword == "" || keyword == ".") {
                        return false;
                    }
                    searchWord = HTMLDecode(keyword);
                    getSearchData().then((data) => {
                        if (typeof searchWorker == "undefined") {
                            searchWorker = new Worker(workerPath);
                        }
                        searchWorker.onmessage = (result) => {
                            let end = new Date().getTime();
                            let data = result.data;
                            console.log(`查询操作用时${end - start}MS`);
                            if (data.length == 0) {
                                console.log("未找到有关选项");
                                return false;
                            }
                            let resultHTML = "";
                            data.forEach((e, index) => {
                                resultHTML += structureSearchResult(e);
                            });
                            console.log(resultHTML); // 结果输出
                        };
                        searchWorker.postMessage([data, searchWord]);
                    });
                }
这实际上是RTheme中相关组件的精简版,它使用getSearchData()方式返回一个Promise,并在存在本地缓存是直接返回或在本地无缓存时请求数据并异步返回。
最主要的功能实现在函数search()的定义内,它会转义搜索词并与Worker通信,将返回结果的每一项传递给新函数structureSearchResult()以构建标准HTML输出。示例中的输出格式如下:
                function structureSearchResult(result) {
                    let cla = "";
                    let tag = "";
                    let match = "";
                    let matchItem,
                    matchNum,
                    matchContext,
                    matchTag,
                    matchClass,
                    matchTitle,
                    matchLinks;
                    let strLinks = "";

                    result.match.forEach((e) => {
                        if (typeof e == "object") {
                            matchItem = e[0];
                        } else {
                            matchItem = e;
                        }
                        switch (matchItem) {
                            case "name":
                                match += "标题 / ";
                                break;
                            case "context":
                                matchNum = e;
                                match += `内容(${e[1]}次) / `;
                                break;
                            case "title":
                                match += "章节 / ";
                                matchTitle = e;
                                break;
                            case "tag":
                                match += "标签 / ";
                                matchTag = e;
                                break;
                            case "class":
                                match += "分类 / ";
                                matchClass = e;
                                break;
                            case "links":
                                match += "外链 / ";
                                matchLinks = e;
                                break;
                        }
                    });
                    result.class.forEach((e, index) => {
                        if (typeof matchClass !== "undefined" & & matchClass[1] == index) {
                            cla += `<a href="#/classification/${e}" class='active'>${e}</a>/`;
                        } else {
                            cla += `<a href="#/classification/${e}">${e}</a>/`;
                        }
                    });
                    cla = cla.substring(0,
                        cla.length - 1);
                    result.tag.forEach((e, index) => {
                        if (typeof matchTag !== "undefined" & & matchTag[1] == index) {
                            tag += `<a href="#/tag/${e}" class='active'>${e}</a>`;
                        } else {
                            tag += `<a href="#/tag/${e}">${e}</a>`;
                        }
                    });
                    match = match.substring(0,
                        match.length - 3);
                    if (typeof matchNum == "undefined" || matchNum[2] < 10) {
                        matchContext = result.context.substring(0, 150);
                    } else {
                        matchContext = result.context.substring(
                            matchNum[2] - 10,
                            matchNum[2] + 140,
                        );
                    }
                    result.links.forEach((e, index) => {
                        if (typeof matchLinks !== "undefined" & & matchLinks[1] == index) {
                            strLinks = `<a class='search-result-links one-line' href='${e}'><span class='i_small ri:link'></span> ${e}</a>`;
                        }
                    });
                    return
                    `<div class="loaded listprogram"><article><span class="article-name"><h4><a href="${result.url}">${result.name}</a></h4></span><p class="articles-info"><span class='search-result-tags'>${match}</span><time>${result.time}</time> • <span class="i_small ri:archive-line"></span><span class="class">${cla}</span><div class='search-result-context'><span class='i_small ri:file-list-2-line'></span> ...${matchContext}</div>${strLinks}</p><p class="articles-tags">${tag}</p></article><hr></div>`
                }
你可以据此使用result.url result.name match result.time cla matchContext strLinks tag等结果字符串自定义你的输出模板。其中,matchContext会返回结果前后共150字符的内容,你可以通过修改CSS实现其样式的优化,或直接参考RTheme
持续构建
在初始化成功后,你可以使用github Workflow在有更改时自动构建。 添加一个.github/workflow/search.xml,示例如下:
                name: RPageSearch
                on:
                    push:
                        paths:
                            - 'articles/**'
                    workflow_dispatch:

                permissions:
                    contents: write
                    pages: write
                    id-token: write

                jobs:
                    build:
                        runs-on: ubuntu-latest #运行环境
                        steps:
                            - name: Checkout
                              uses: actions/checkout@v2
                            - name: 'Git set'
                              run: |
                                  git init
                                  git pull
                            - name: 'Set up nodejs'
                              uses: actions/setup-node@v3
                              with:
                                  node-version: 'latest'
                            - name: 'Install requirements'
                              run: |
                                  npm install
                            - name: 'Working'
                              run: |
                                  node search.js
                            - name: Commit files
                              continue-on-error: True
                              run: |
                                  git diff
                                  git config --local user.email "dr_hamilton@foxmail.com"
                                  git config --local user.name "Ravello-H"
                                  git add -A
                                  git commit -m "[RPageSearch]`date '+%Y-%m-%d %H:%M:%S'`" || exit
                                  git status
                                  git push -f
进阶
因为能提供索引文件,你可以据此生成其他文件。参照以下项目:
Github:RavelloH/local-feed-generation